Import Data
This page explains how to import data into B-FabricAdd a Sample
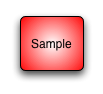
A Sample is the biological (or chemical ,etc.) source of your measurement (e.g. a leave from a plant, a mouse ear or a cell culture).- Transciptomics: For each microarray normally one sample is registered
To add a sample into B-Fabric, follow these steps:
- Select Add Sample from the main navigation
- The fields marked with a red dot are mandatory
- Give the sample a meaningful name
- Only numbers, latin characters and _ are allowed.
- The sample name has to be unique within the FGCZ
- Select the Project where to use the sample
- Select the Sample Type. Depending of the selected type, you will have different kind of annotations to select from (Biological sample, chemical sample, etc.).
- Fill in the fields of the form as precise as possible. The information provided can later be reused to analyze your data.
- If an annotation term you need is not in the drop-down menu, just use the "Add" button to enter a new term.
Add an Extract
An Extract is the substance that in fact is measured in the instrument (e.g. membrane fraction).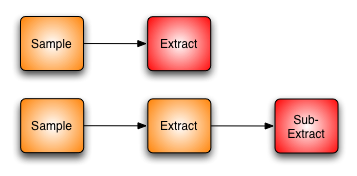
To add an extract into B-Fabric, follow these steps:
- Select Add Extract from the main menu or use the Create Extract button from the lower right of the sample screen.
- The fields marked with a red dot are mandatory
- Give the extract a meaningful name
- Only numbers, latin characters and _ are allowed.
- The extract name has to be unique within the FGCZ
- Select the Project where to use the extract
- Select the Parent Type of the extract. An extract is either derived from a sample or one or more other extracts.
- Parent type Sample. As samples are just descriptions of the source of the experiment, they cannot directly be processed. It is always necessary to create an extract.
- Parent type Extract. By selecting this parent type you will be able to mix other extracts together for further processing.
- Select the Extract Type. Depending on this selection you can further describe your extract.
- Fill in the fields of the form as precise as possible. The information provided can later be reused to analyze your data.
- If an annotation term you need is not in the drop-down menu, just use the "Add" button to enter a new term.
Import Data
Importing data involves grouping the resources (files) under a container called workunit and assigning the defined Extracts to the Resources.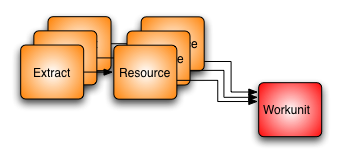
- Navigate to the target (running) project.
- Click on the item "Import" of the "Workunits" menu in the Header. This will redirect you the the run-application-import screen.
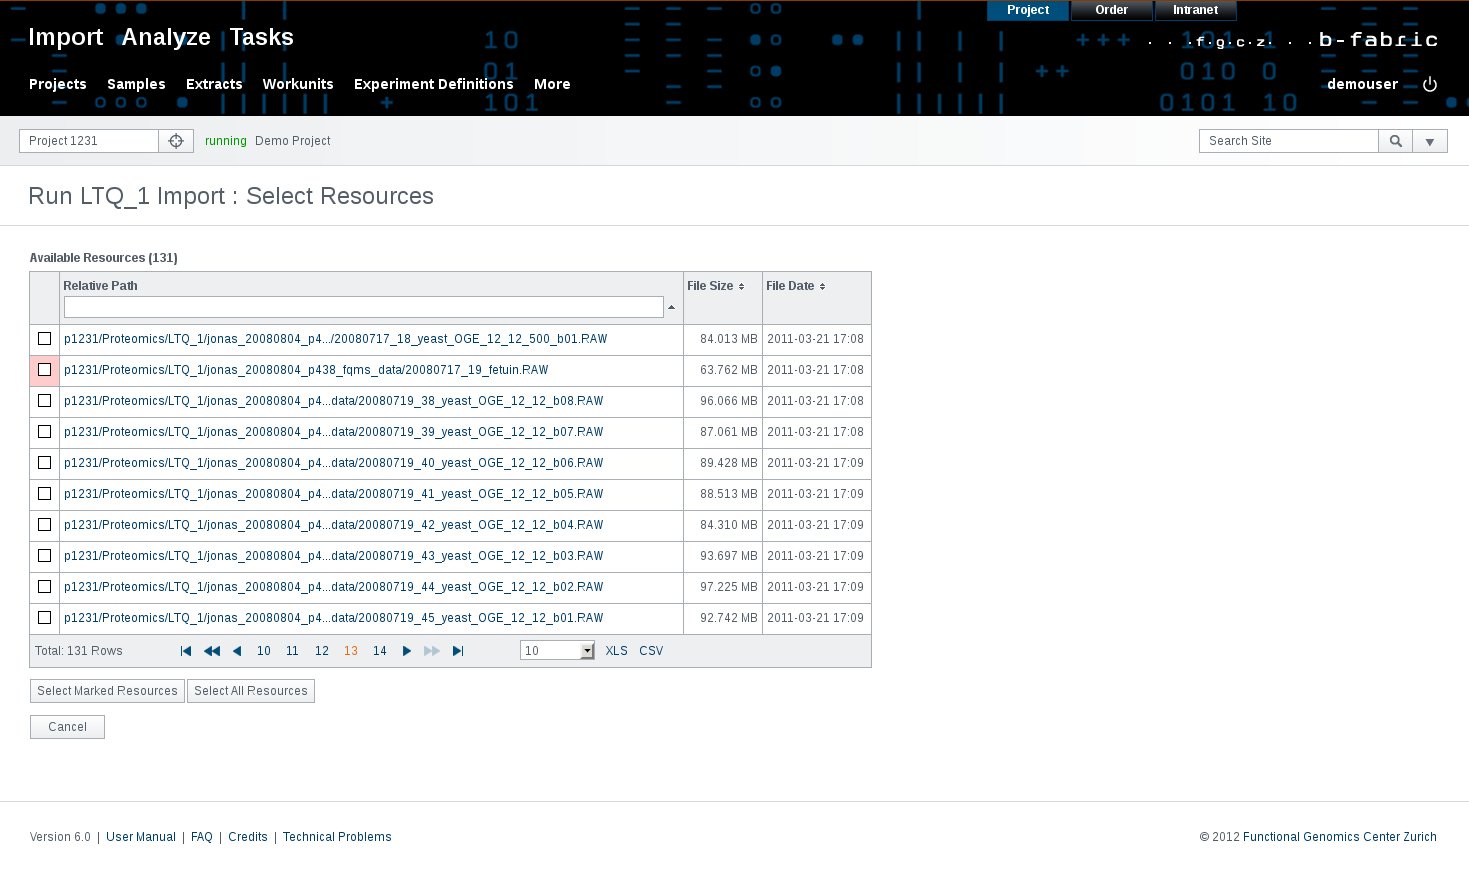
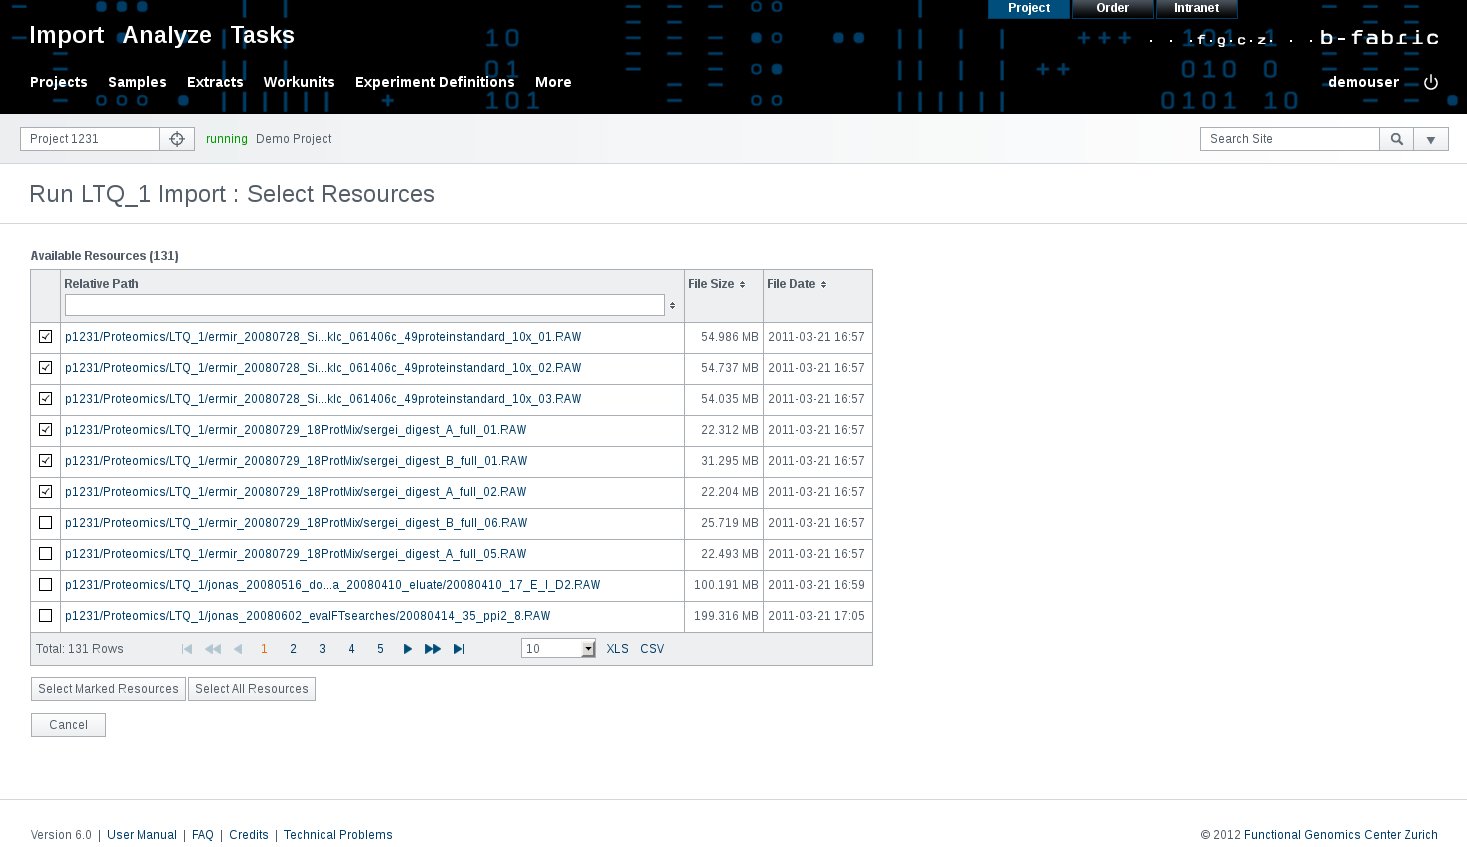
- The applications are grouped according to the technology they belong to. The name of an application is often the name of an instrument. Assume that one wants to import resources with the application "LTQ_1 Import" (Proteomics), then one needs to click on the Proteomics (which displays all available applications for this technology), and then on "LTQ_1 Import". This redirects one to the import-resources-select.html screen, as shown in the following figure. The most left column of the table only contains check boxes. Clicking on such a check box only marks the corresponding resource, it does not select them.
- After at least one resource is marked, one can click on the "Select Marked Resources" button; through this, the resources will be placed in the lower table; they are considered to be selected now. After at least one resource was selected, the "Next" button will become available in the lower part of the screen. Note that in the previous figure, it is displayed that 131 resources are available; now 125 resources are considered available (upper table), 6 of them are considered selected (lower table).
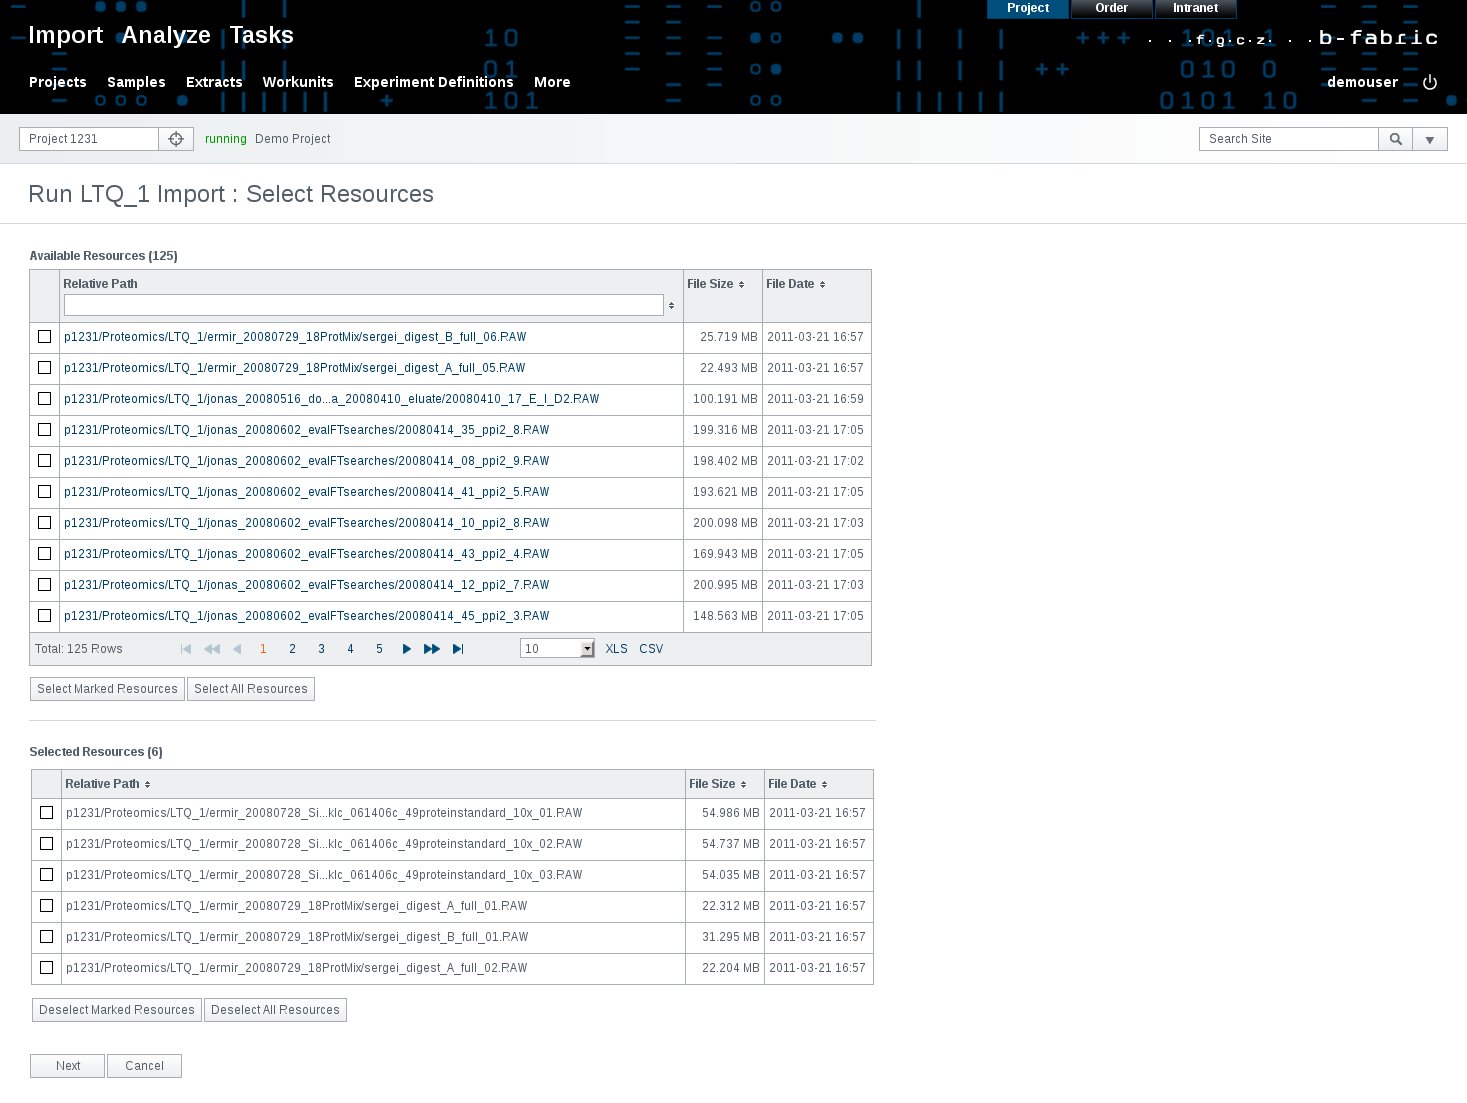
- If some resources have been selected by mistake, it is still possible to deselect them by marking them and then by clicking on the "Deselect Marked Resources" button. If one is not happy with the selection at all, then clicking on the button "Deselect All Resources" will deselect all of them, regardless of whether they have been marked or not.
- Next to the "Select Marked Resources" button, one can see the "Select All Resources" button. Clicking on it will select all available resources, regardless of whether they have been marked or not. In order to reduce the amount of available resources, one could enter some filter criteria in the input field found in the "Relative Path" header cell. The "*" is a placeholder for zero or more characters. After entering the content, pressing the "Enter" button (Keyboard) will trigger the filtering process.

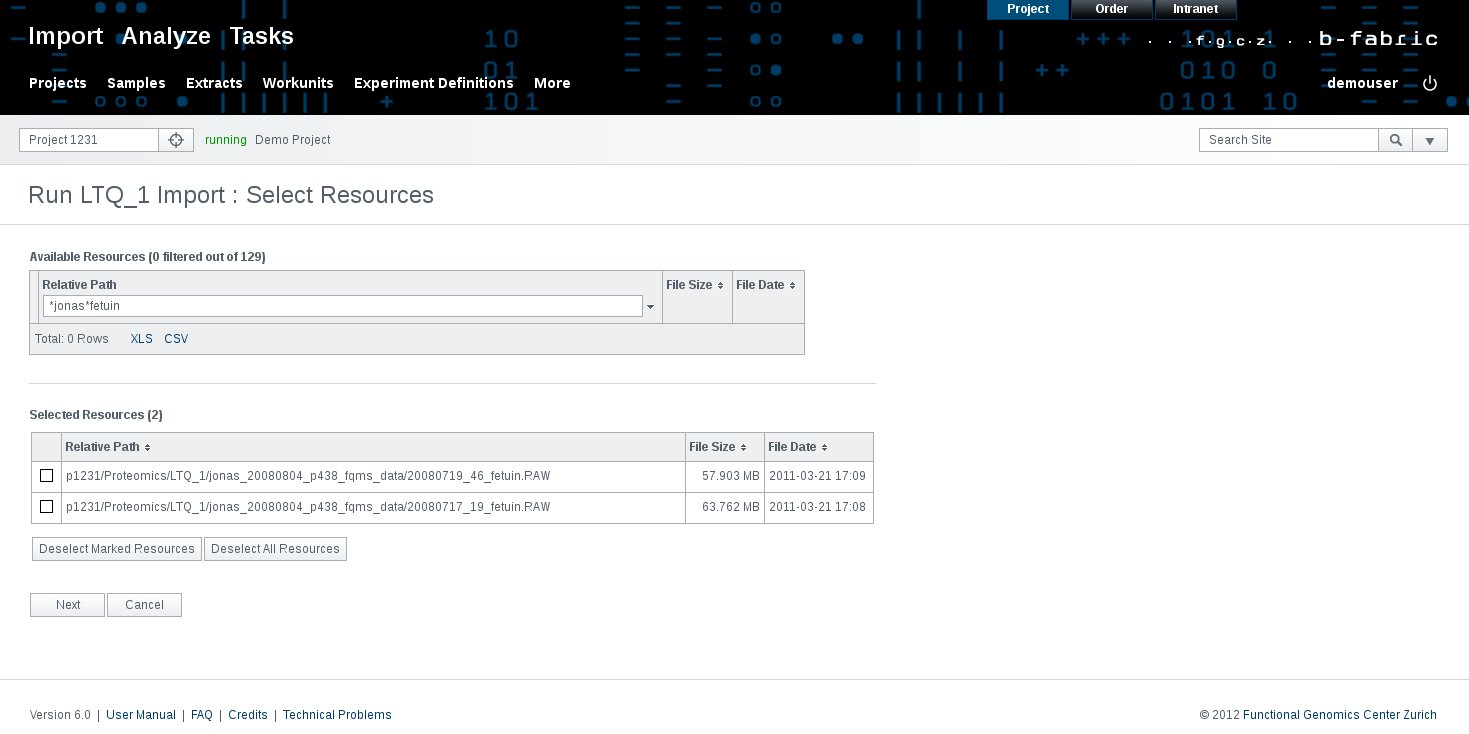
- Now if one clicks on "Select All Resources" button, only filtered resources will be selected.
- Clicking on the "Next" button will redirect one to the next screen, namely import-resources-assign-extracts.html screen. At this point, one can assign extracts to the selected resources (but one is not obliged to do so).
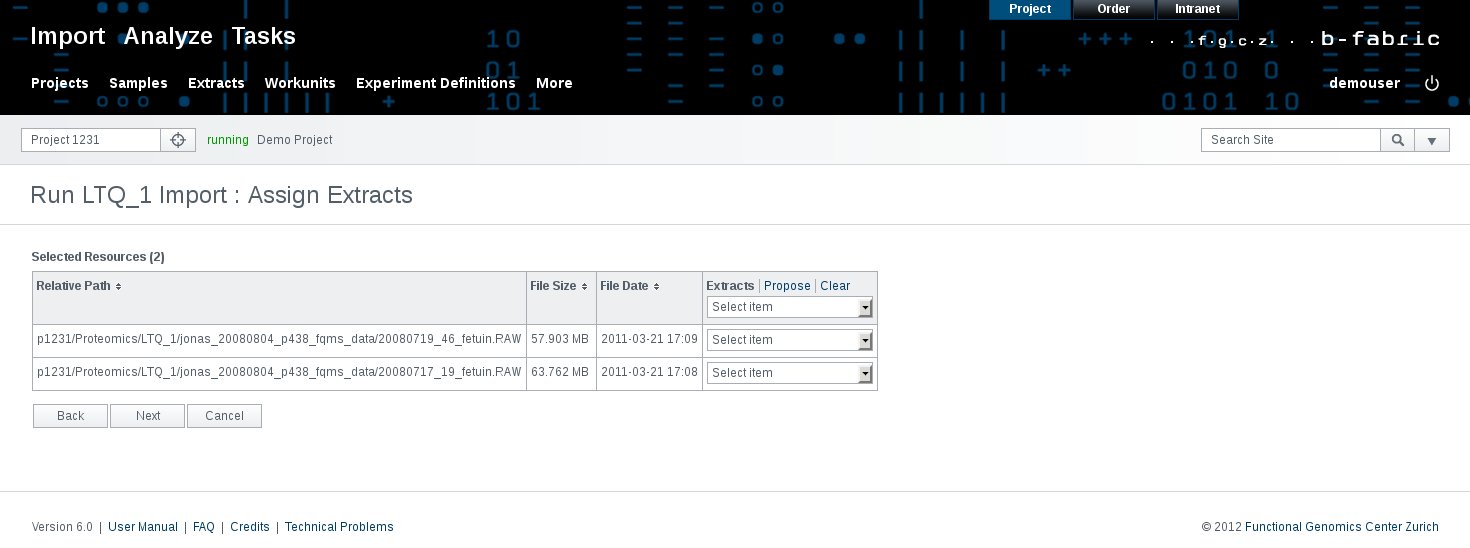
- There are several helpful features which may help one with the selection. In the "Extracts" header, one can see two links (Propose, Clear) as well as one "Select One Menu". When clicking on the "Propose" link, the system will propose extracts based on similarities between the extract name and the resource name. When selecting an extract in the "Select One Menu" in the header, the selected extract will be assigned to all resources. Selecting an extract in a "Select One Menu" in another line will assign the selected extract only to the corresponding resource. Clicking on the "Clear" link will unassign all extracts.
- If one has noticed that not all desired resources have been imported, then one can click on the "Back" button, which will redirect one the the previous screen. Clicking on the "Next" button redirects one to the edit-workunit.html screen.
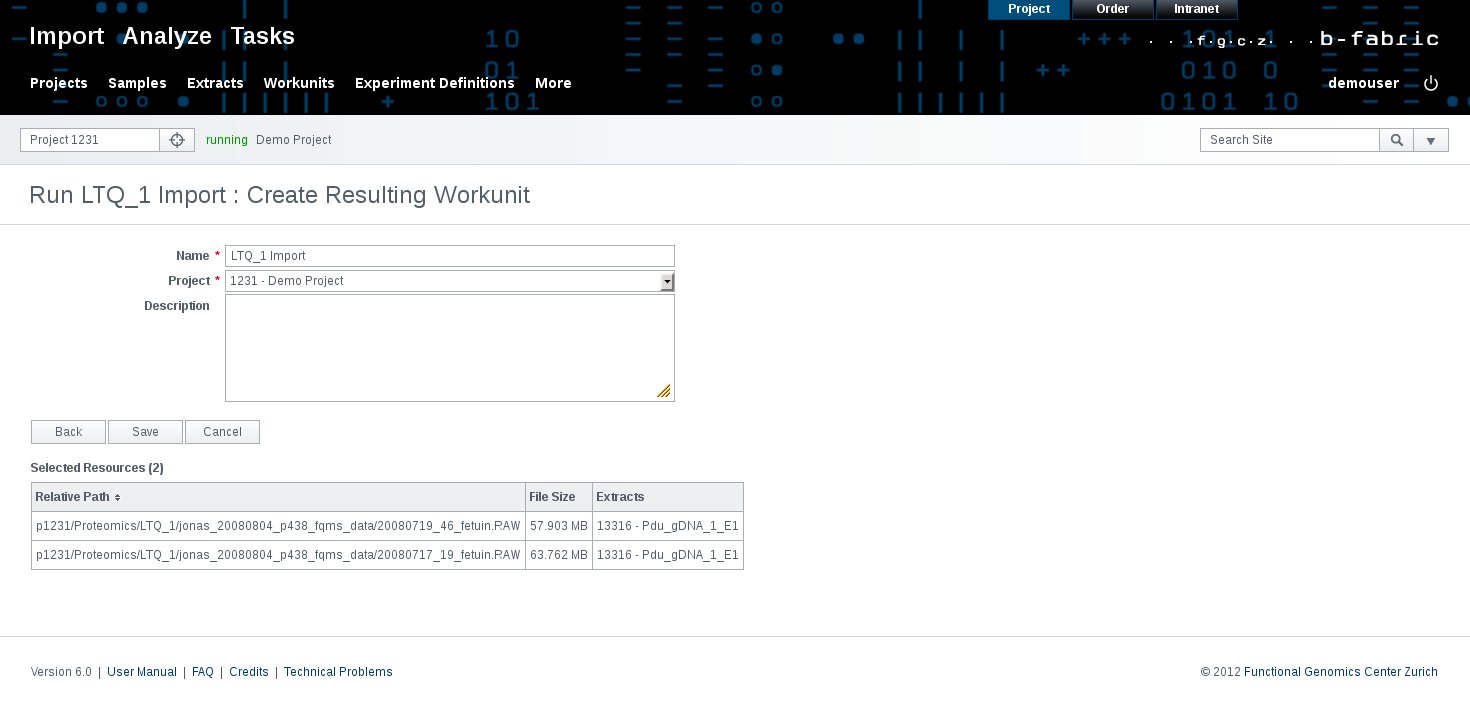
- On this screen, one can enter the name of the workunit (the default suggestion is simply the application name), as well as the project and the description. The lower table contains an overview of the selected resources. Click on the "Save" button will finally create a workunit with the provided configuration and redirect one to the show-workunit.html screen.
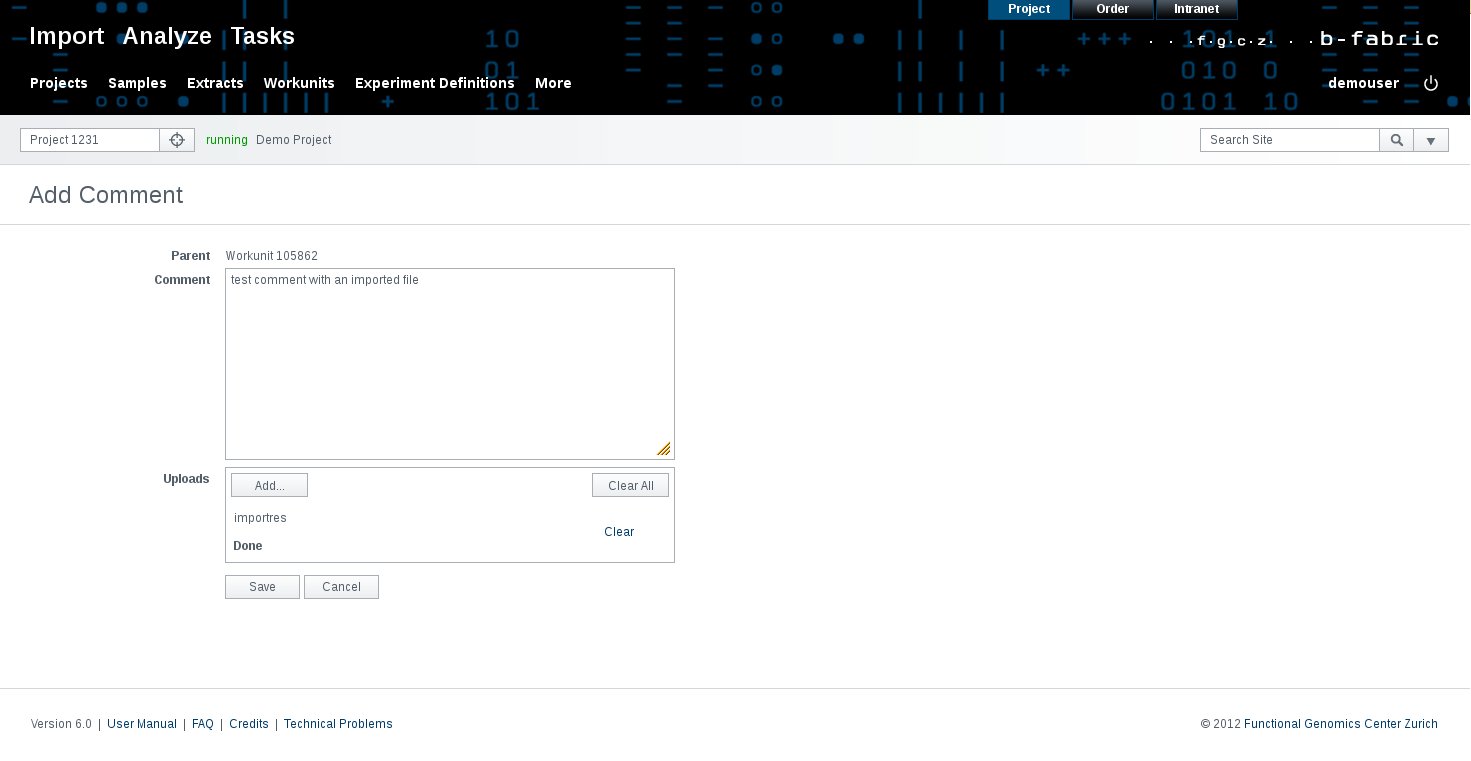
- Optionally one can add comments to a workunit and also attach additional files to it. Therefore, one can click on the "Comments" link on the left side of the screen, then on "Add Comment". A file which is to be uploaded must not be larger than 10 MB. Finally, click on the "Save" button.
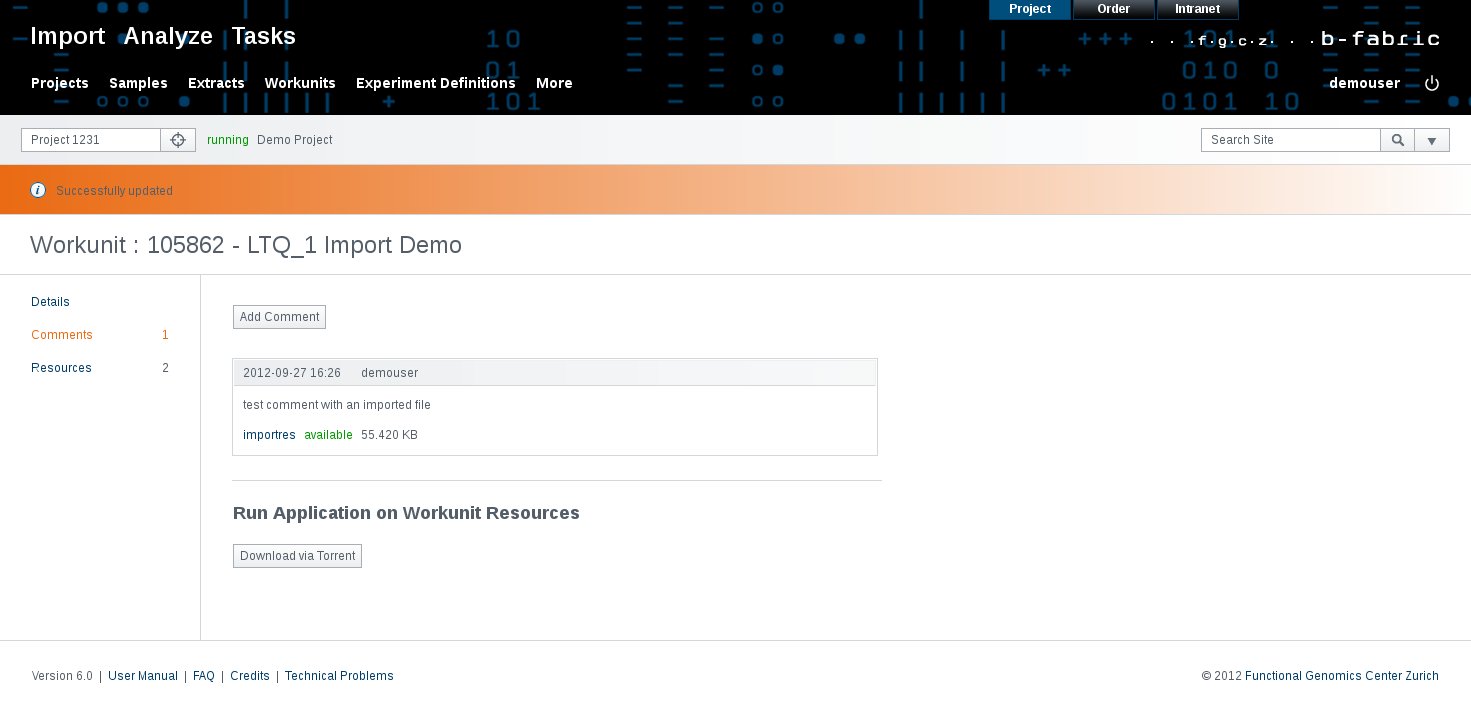
- The uploaded file can be downloaded by other users (with appropriate permissions) by clicking on the name of the file in the comment.
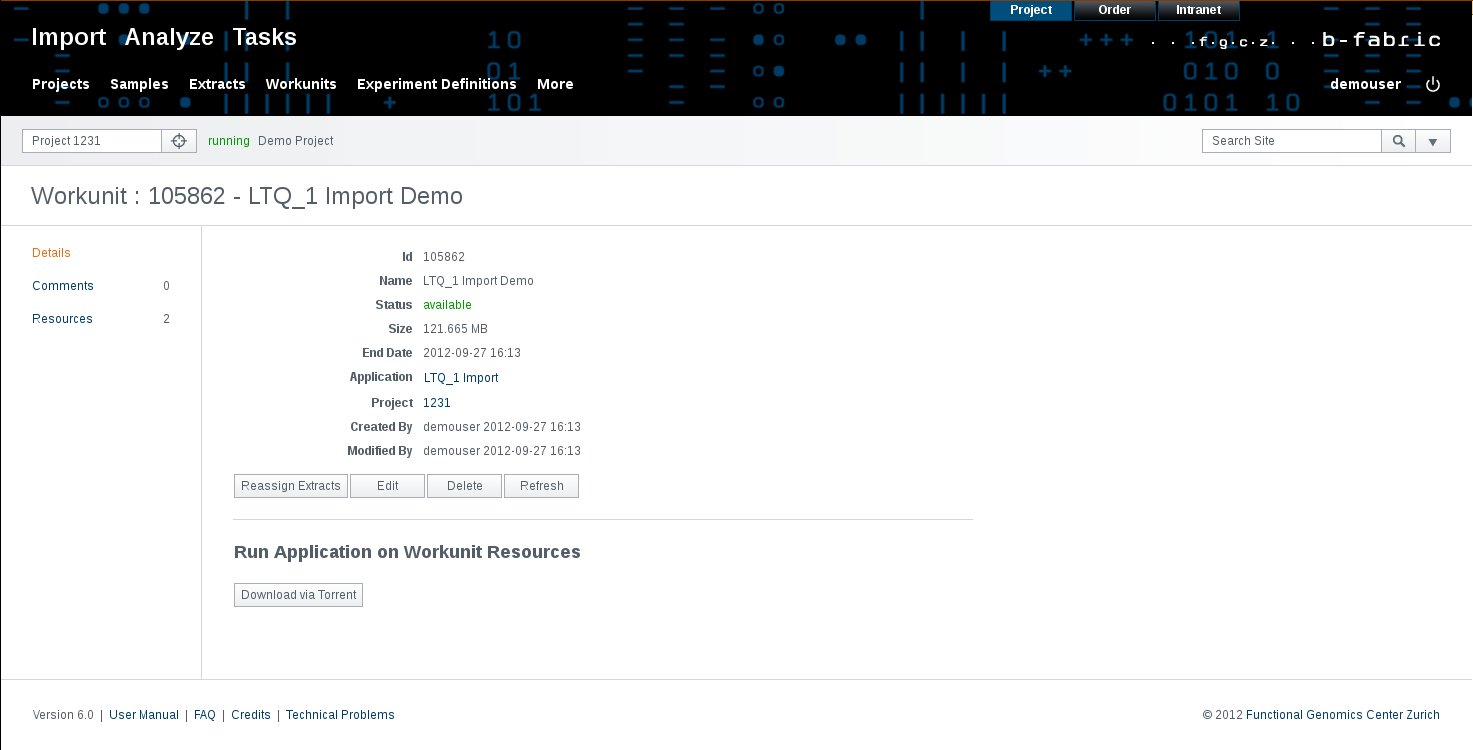
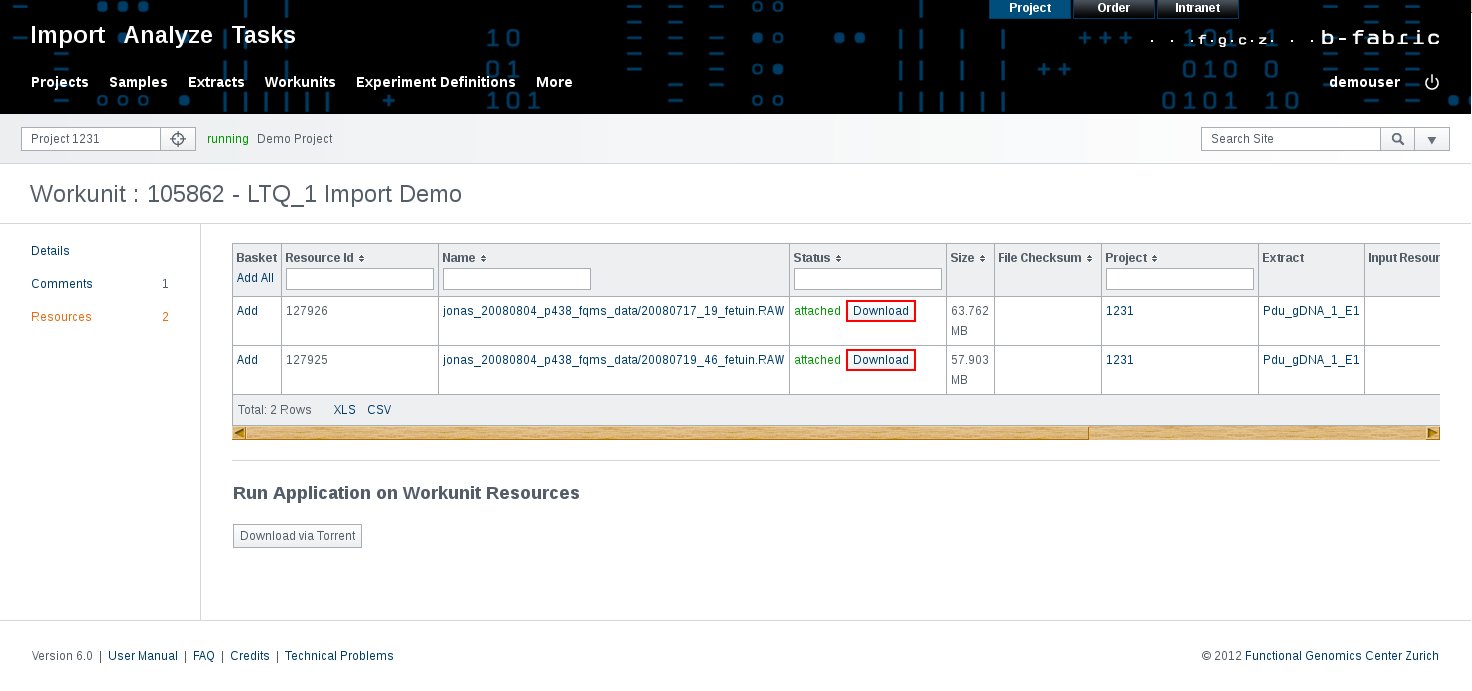
- By clicking on the "Resources" link on the left side, the table with all previously selected resources is displayed. If the workunit has the status "available" then one will be able to download the listed resources by clicking on the "Download" button.
- When the creation of a workunit is started next time, for the resources which have been already imported, the cell which contains the check box will be displayed red. This is only a hint for the user, it is still perfectly legal to import again an already imported resource.